Machining Time Selection of Crane Flange Plane
Table of Contents
|
In the installation process of large crane, the flatness of crane flange will change. The conventional practice is to machine the crane flange plane after the assembly and welding of the crane base assembly, so as to ensure that the flatness of the crane flange meets the requirements of the design drawing. This paper describes the test method and process of crane flange plane machining before crane base assembly and welding. The test results show that, under the conditions of lifting scheme and welding technology with effective deformation control, the flatness of the crane flange changes very little after the assembly and welding of the crane base assembly, which can meet the requirements of the design drawing. It saves time for the subsequent installation of the rotary platform, shortens the installation cycle of the crane and avoids the safety risks brought by aloft work, thus bringing good economic benefits to the shipyard. |
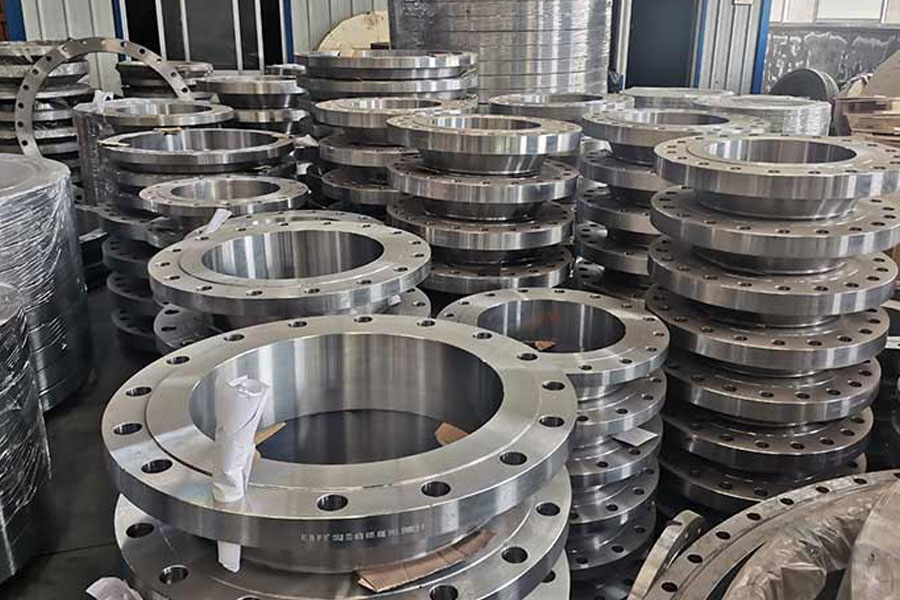
In the overall design of multi-functional ships and various platforms, it has become normal to equip large cranes. Generally, a large crane is composed of a crane base, a crane flange (with its own cylinder), a slewing platform, a tripod, and a boom. Among them, the crane base is in the shape of a round sky, which is made by the shipyard, and the rest are purchased. The flatness of the flange is a very important technical index, it will
It directly affects the bonding degree and pre-tightening state between the two connecting flange planes. How to control the flatness of the crane flange is not too bad, which is the focus of the crane installation process. The conventional method is to first assemble and weld the crane base and crane flange into components under the ship (hereinafter referred to as the crane base assembly), then assemble and weld the crane base assembly to the crane, and finally machine the crane flange plane . Since the machining of the crane flange plane on the ship is a high-altitude operation, there is a safety risk, and the machining time is long, which affects the crane installation cycle. For this reason, we have passed the test verification and selected the crane base components to be assembled and welded under the ship, and then the crane flange is flat.
The feasibility of machining the surface.
2 Test method
This test was carried out during the installation of a 350 t lifting crane on a certain type of platform. The crane flange design dimensions are: the flange comes with a cylinder outer diameter of 7 590 mm, a theoretical thickness of 110 mm, an outer diameter of 7 910 mm, an inner diameter of 7 470 mm, a circle diameter of the center of the connecting bolt hole 7 760 mm, and a connecting bolt of 150 *M60 mm uniformly distributed. The design drawing requires 1.5 mm for the flatness of the crane flange, as shown in Figure 1.
We measure the flatness of the crane flange at the following five nodes:
- (1) After the crane flange arrives;
- (2) After the assembly of the crane base assembly is completed;
- (3) After the welding of the crane base components is completed;
- (4) After the assembly of the crane base assembly gondolas is completed;
- (5) After the welding of the crane base components on the ship is completed.
Analyze the flatness value and change trend of each node to determine the feasibility of machining the crane flange plane after the crane base assembly is welded.
3 Test results and analysis
3.1 After the crane flange arrives
It was decided by the special meeting that the flatness of the crane flange should not be greater than 1.5 mm when the manufacturer delivers; considering the deformation of the transfer and hoisting, the flange thickness reserves 6~10 mm for secondary processing.
Before the crane flange arrives, the adjustable tooling support shall be arranged at the selected placement site. There are a total of 8 tooling supports, which are arranged in equal parts according to the circumference of the lower mouth of the crane flange cylinder; and the flatness of the support is measured with a total station, and the flatness of the support is controlled within 2 mm by adjusting the support height; the crane flange After the arrival of the goods, the crane flange is placed on the fixture support through the shipyard gantry crane. At this time, the flatness measured by the laser leveling instrument is 3.99 mm. This is because although the manufacturer processes the flatness of the crane flange to within 1.5 mm, the flatness deviation of the flange is relatively large due to multiple lifting and transfer. Big increase.
3.2 After the assembly of the crane base assembly is completed
Adjustable tooling supports are arranged at the selected assembly site. There are 12 tooling supports, which are arranged in equal parts according to the circumference of the lower mouth of the crane base; the flatness of the support is measured with a total station, and the flatness of the support is controlled within 2 mm by adjusting the support height; the crane base is from the shipyard sand room After coming out, pay attention to adjust the direction of the transfer truck to ensure that the placement direction of the crane base is consistent with the direction after loading; hoist the crane base to the tooling support, and then hang the crane flange to the crane base after standing for 8 hours The upper part is assembled with the crane base according to the assembly requirements of the drawings, and is positioned with a welding code plate. At this time, the flatness measured by the laser level gauge is 3.38 mm. At this time, the flatness deviation of the crane flange is slightly reduced. This is because after the crane flange is hoisted to the upper mouth of the crane base, the support point increases, which reduces the flatness deviation.
3.3 After the welding of the crane base components is completed
Regarding that the material of the crane flange is EH36 and the material of the crane base is EH500.
During the welding process, the interlayer temperature, welding current, voltage and welding speed should be strictly controlled. Before welding, preheat the welding part and the surrounding 3 times the thickness of the plate to 120 ℃, and the interlayer temperature is ≥ 110 ℃; the welding is welded by an even number of welders at the same time, and each section of the weld is divided into 600~1 000 mm, and the section is drawn back. Welding is carried out; after the welding is finished and the weld is cooled, the flatness of the crane flange is 5.42 mm measured with a laser level gauge. At this time, the flatness deviation of the crane flange increases, because the welding joint is 1 335 mm from the crane flange plane, and the shrinkage of the welding seam has a greater impact on the flatness of the crane flange; in addition, the welding joint is being welded. The process was not completely symmetrical, and the temperature between the welding layers was not monitored in real time, which resulted in an increase in the flatness deviation of the crane flange.
The theoretical thickness of the crane flange is 110 mm, the actual incoming goods are 120 mm, and there is a machining allowance of 10 mm, so the machining allowance is sufficient; the flatness of the crane flange is both when the crane base assembly is assembled and the ship is welded. There will be changes, but since the lower part of the crane base assembly is 7 906 mm away from the crane flange plane, the flange flatness caused by welding with the hull does not change much. Based on the above analysis, we believe that controlling the lifting deformation is the key. As long as the lifting deformation is controlled properly, it is feasible to choose to machine the flange plane of the crane at this time.
The weight of the hoisting operation is calculated according to the hoisting process: the total weight of the crane base components is 132.2 t, the total weight of the 2# and 3# hooks of the gantry crane is 63.7 t; Withstand a total weight of 160 t (excluding the weight of the gantry crane). The hoisting code is arranged in this position, and there is a set of self-reinforced crane base above the hoisting code. The force acts on the ring-shaped reinforcing plate, which has little effect on the flatness of the crane flange.
Use a set of reinforced installation milling machines that come with the crane flange barrel to process the flange plane. Considering that there will be crane base components hoisting, assembling and welding work, the flange flatness is required to be processed to 0.80 Within mm; after processing, install a dial indicator on the milling machine
The measured flatness is 0.75 mm, which is far less than the 1.5 mm required by the drawing; the flange thickness is measured with a caliper, and the minimum thickness is 115.52 mm, which is greater than the 110 mm required by the drawing. After the machining of the flange plane of the crane is completed, the reinforcement of the original cylinder body is not removed, and a set of reinforced supports is added 100 mm down from the lower plane (the support pad and the flange cylinder body are not welded), and the crane base assembly The middle and lower parts still retain two sets of segmented temporary reinforcement; the finished crane flange plane is covered with three-proof cloth after applying butter to prevent dust and rain erosion; when installing the rotary platform in the later stage, complete the three-proof cloth one hour in advance Demolition and butter removal work. The hoisting code and strengthening arrangement for hoisting the crane base components.
3.4 After the assembly of the crane base assembly on board is completed
Use a 900t gantry crane to hoist the crane base components. Check the installation direction of the crane base assembly before hoisting; the crane base assembly and the top of the ship’s pile-fixing chamber are assembled and positioned, and restraint welding is performed after meeting the requirements. The length of constrained welding seam should not be less than 70 mm, and the distance should be 800~1 000 mm. The constrained welding is welded symmetrically by an even number of welders at the same time; after assembly and positioning, the flatness of the crane flange is measured with a laser level gauge. A total of 30 points are measured, one point at an interval of 12°. The measurement data shows that the flatness of the crane flange is slightly increased than the above 0.75 mm after the crane base assembly is assembled on the crane, but it is still controllable.
3.5 After welding of crane base components on board is completed
After the crane base assembly crane assembly is completed, the following welding process measures to control deformation have been formulated: after each symmetric welding of 600 to 1 000 mm welds, the flatness of the crane flange surface is measured. If the requirements are met, continue to complete the welding of the remaining sections and measure the flatness of the crane flange surface; if the requirements are not met, the welding should be stopped immediately, and the process personnel shall study and formulate countermeasures. After many measurements, the flatness of the flange surface of the crane is within the requirements of the design drawings; after all welding is completed and the weld is cooled, the flatness of the flange of the crane is measured with a laser level gauge, and a total of 30 points are measured. One point every 12°. The measurement data shows that after the welding of the crane base assembly and the hull is completed, due to the welding heat shrinkage, the flatness of the crane flange is slightly increased, and the final value is 1.16 mm, which meets the requirements of the design drawings.
4 Conclusion
Tests have proved that in the installation process of large cranes, as long as the tooling support, hoisting scheme and welding process are used to effectively control the deformation, the crane base components are selected to be machined after the crane base components are assembled and welded under the ship. Is feasible. It can save time for subsequent installation of the rotary platform, shorten the crane installation cycle and avoid the safety risks caused by high-altitude operations, and bring good economic benefits to the shipyard. This experience is worthy of reference and reference by other shipyards.
Link to this article: Machining Time Selection of Crane Flange Plane
Reprint Statement: If there are no special instructions, all articles on this site are original. Please indicate the source for reprinting:https://www.cncmachiningptj.com/,thanks!
 PTJ CNC shop produces parts with excellent mechanical properties, accuracy and repeatability from metal and plastic. 5 axis CNC milling available.Machining high-temperature alloy range inclouding inconel machining,monel machining,Geek Ascology machining,Carp 49 machining,Hastelloy machining,Nitronic-60 machining,Hymu 80 machining,Tool Steel machining,etc.,. Ideal for aerospace applications.CNC machining produces parts with excellent mechanical properties, accuracy and repeatability from metal and plastic. 3-axis & 5-axis CNC milling available.We will strategize with you to provide the most cost-effective services to help you reach your target,Welcome to Contact us ( [email protected] ) directly for your new project.
Link to this article:Machining Time Selection of Crane Flange Plane
Reprint Statement: If there are no special instructions, all articles on this site are original. Please indicate the source for reprinting.:Cnc Machining,Thank!^^

