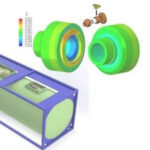
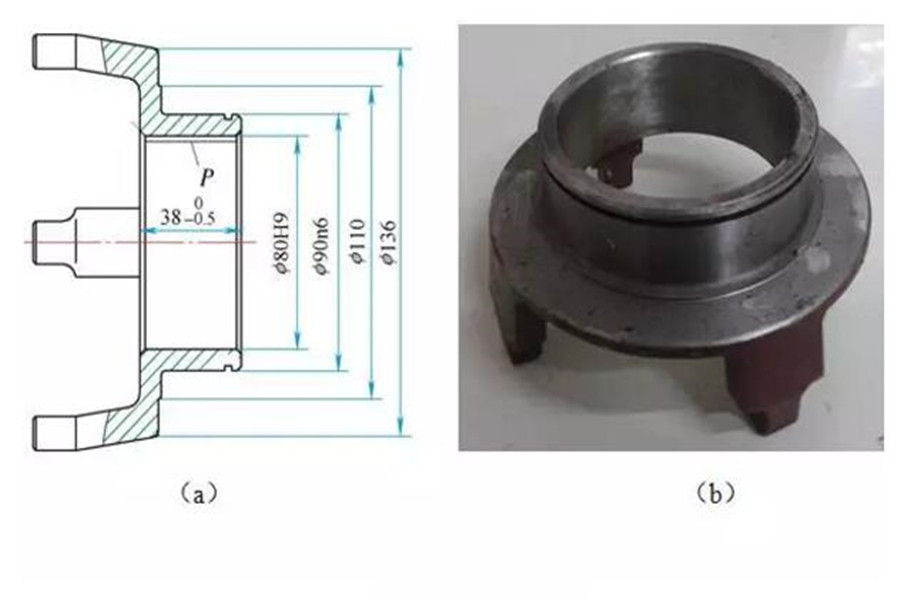
A guide sleeve is installed in the central transmission of the new full-hydraulic bulldozer produced by our company. This part cooperates with the flange plate to play a guiding and fixing role.
Because of its higher matching accuracy and higher hardness to improve wear resistance , And because this piece is a thin-walled piece (5mm), heat treatment is easy to deform, and the heat treatment is more difficult. This article proposes several heat treatment schemes for this piece, analyzes and discusses each scheme, and selects the most reasonable heat treatment process.
1. Overview of guide sleeve
Table of Contents
Part name: guide sleeve, design material: ZG35SiMn, P part requires induction hardening, hardened layer depth: 1.5 ~ 2.5mm, surface hardness: 52 ~ 60HRC.
The design process route of this piece is: casting → normalizing → rough machining → quenching and tempering → finishing → induction quenching → grinding inner and outer circles. This part is a thin-walled part with a wall thickness of about 5mm. The heat-affected zone is large during induction heat treatment, and the deformation after induction heat treatment is large, and some parts are elliptical. Due to the large deformation, the depth of the hardened layer at some positions after grinding is insufficient, which cannot meet the requirements of use . The chemical composition of this piece is shown in Table 1, which meets the requirements of ZG35SiMn chemical composition. Before induction heat treatment, there is no problem in each process.
2. Detection
In order to reduce the heat-affected zone, a special outer-circle water spray cooling jacket is designed, and water is sprayed to cool the outer circle corresponding to the heating part during heating to reduce heat diffusion and heat-affected zone to reduce deformation. After many tests, the deformation problem has not been solved. Adjusting the cooling water flow, pressure, induction hardening frequency, power and other adjustments still cannot solve the deformation problem.
Select the parts with larger deformation for necropsy. The results of the necropsy are shown in Figure 2 and Figure 3. The depth of the surface hardened layer after the grinding is only 0.603mm, which is not up to the requirement. The metallographic structure is: tempered martensite + ferrite, surface hardness 54~56HRC, grain size 9 grade, core hardness 315HBW.
The induction hardening process cannot meet the design requirements, and many adjustments to the process parameters and tooling can not solve the problem. The designers and process personnel of our company repeatedly discussed the design of two solutions:
(1) The material of the piece is changed to 20CrMnTi, and carburizing heat treatment is used to improve its wear resistance. The process route is: blanking→forging→normalizing→processing→carburizing direct quenching→grinding the inner and outer circles; the surface hardness is: 58~ 63HRC, hardened layer depth 1.5~2.5mm, hardened layer grain size ≥8 grade, retained austenite ≤20%, carbide ≤3 grade.
(2) The material of the piece is ZG35SiMn, and ion nitriding heat treatment is used to improve its wear resistance. The process route is: blanking→forging→normalizing→processing→tempering→processing→grinding inner and outer circle→ion nitriding. The surface hardness is ≥613HV1, the depth of the nitrided layer is ≥0.3mm, the looseness level of the nitriding layer is ≤3, and the nitride level of the nitriding layer is ≤3.
3. Test
For the above two process schemes, our company produced 20 test pieces and carried out process tests.
(1) Carburizing process test
According to the workpiece material, structure and related technical requirements, the carburizing heat treatment process of the guide sleeve is determined.
The deformation was detected before and after the direct heat treatment of carburizing. The problem of large deformation still exists, elliptical deformation occurs, and the deformation problem cannot be eliminated after grinding.
(2) Ion nitriding process test
According to the workpiece material, structure and related technical requirements, the ion nitriding heat treatment process of the guide sleeve is determined. .
The inner diameter of the guide sleeve before and after ion nitriding was tested. The comparison result is shown in Table 4. The deformation is greatly reduced and meets the requirements.
4. Conclusion
Through the comparison of the above three measures, it is found that the ion nitriding process can greatly reduce the deformation of the workpiece. Through the verification of the installation, the main machine works for 2000h without any feedback of the quality of the guide sleeve; the guide sleeve is removed after 2000h, and the wear layer is very small. It can almost be ignored.
Link to this article: Heat treatment process of thin-walled guide sleeve
Reprint Statement: If there are no special instructions, all articles on this site are original. Please indicate the source for reprinting:https://www.cncmachiningptj.com/,thanks!
 PTJ® provides a full range of Custom Precision cnc machining china services.ISO 9001:2015 &AS-9100 certified. 3, 4 and 5-axis rapid precision CNC machining services including milling, sheet metal to customer specifications,Capable of metal & plastic machined parts with +/-0.005 mm tolerance.Secondary services include CNC and conventional grinding, laser cutting,drilling,die casting,sheet metal and stamping.Providing prototypes, full production runs, technical support and full inspection.Serves the automotive, aerospace, mold&fixture,led lighting,medical,bicycle, and consumer electronics industries. On-time delivery.Tell us a little about your project’s budget and expected delivery time. We will strategize with you to provide the most cost-effective services to help you reach your target,Welcome to Contact us ( [email protected] ) directly for your new project.
Link to this article:Heat treatment process of thin-walled guide sleeve
Reprint Statement: If there are no special instructions, all articles on this site are original. Please indicate the source for reprinting.:Cnc Machining,Thank!^^

